
Raspberry Pi: valdykite GPIO kaiščius - kaip tai veikia
Šiame puslapyje mes parodysime, kaip galite lengvai valdyti „Raspberry Pi“ GPIO kontaktus. Paveikslėlių galerija su atskirais žingsniais rodo jums išsamią informaciją.
Raspberry Pi: nuotolinio valdymo pulto GPIO mygtukai su jūsų išmaniuoju telefonu
Pirmiausia norėtume parodyti, kaip galite valdyti „Raspberry Pi“ GPIO kontaktus savo išmaniuoju telefonu. Mes taip pat parodome visus veiksmus paveikslėlių galerijoje straipsnio pabaigoje.
- Pirmiausia atsisiųskite nemokamą „Blynk“ programą, skirtą „iOS“ ar „Android“. Paleiskite programą ir sukurkite nemokamą „Blynk“ paskyrą.
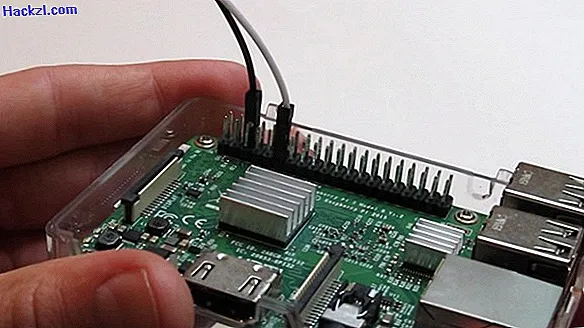
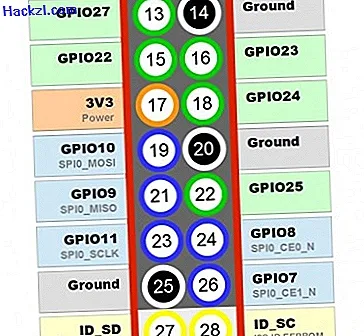
- Šiame pavyzdyje norime pabandyti valdyti mažą lempą. Norėdami tai padaryti, pirmiausia prijunkite laidą prie šešto GPIO kaiščio. Šis kaištis yra įžeminimo kaištis, kuris vėliau veiks kaip neigiamas polius. Tada prijunkite kitą laidą prie vienuoliktojo GPIO kaiščio. Tai tiekia 3, 3 volto įtampą ir vėliau veiks kaip teigiamas polius. Tada prijunkite laidus su maža lempa. Čia taip pat gali tekti įterpti rezistorių. Naudodami šviesos diodus, taip pat turite atkreipti dėmesį į poliškumą.
- Vėl atidarykite „Blynk“ programą ir sukurkite naują projektą. Suteikite projektui pavadinimą, skiltyje „Pasirinkite įrenginį“ pasirinkite savo Raspberry Pi ir galiausiai pasirinkite ryšio tipą.
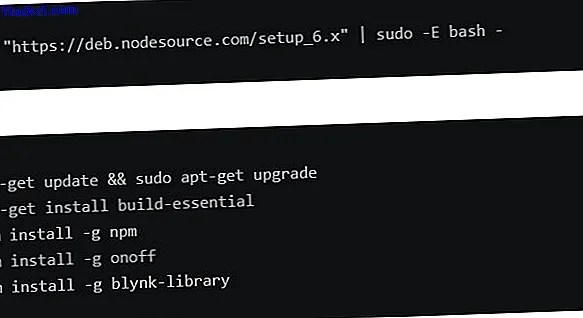
- Tada paleiskite savo „Raspberry Pi“ ir vykdykite komandą »curl -sL" //deb.nodesource.com/setup_6.x "| sudo -E bash - «(su kabutėmis komandos viduje). Tada atnaujinkite „Raspbian“ su komanda „sudo apt-get update && sudo apt-get upgrade“. Tada įdiekite „build-essential“ naudodami komandą »sudo apt-get install build-essential«. Galiausiai, naudodamiesi „Node Package Manager“, turite pridėti „npm“ (su komanda: »sudo npm install -g npm«), „onoff“ (su komanda: „sudo npm install -g onoff“) ir „blynk-library“. (su komanda: „sudo npm install -g blynk-library“).
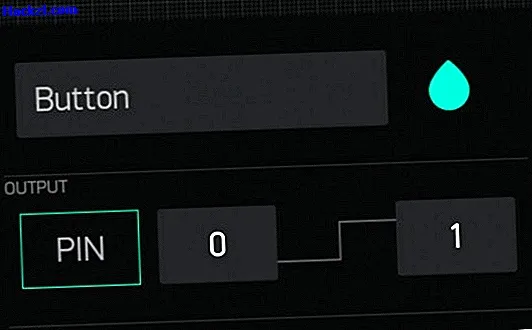
- Tada pridėkite naują valdiklį „Blynk“ programoje: norėdami valdyti mažą lemputę, mes tiesiog rekomenduojame įprastą „mygtuką“. Mygtuko nustatymuose pasirinkite GPIO smeigtuką, prie kurio taip pat prijungta lempa.
- Eikite į savo el. Pašto dėžutę. Iki šiol jūs turėtumėte gauti automatiškai sugeneruotą „Blynk“ el. Laišką, kuriame yra autentifikacijos prieigos raktas. Naudodami šį autentifikavimo žetoną galite lengvai paleisti „Blynk“ klientą. Mūsų atveju terminale turėjome vykdyti komandą „blynk-client 715f8cafe95f4a91bae319d0376caa8c“. Galiausiai „Blynk“ programoje spustelėkite mygtuką Pradėti.
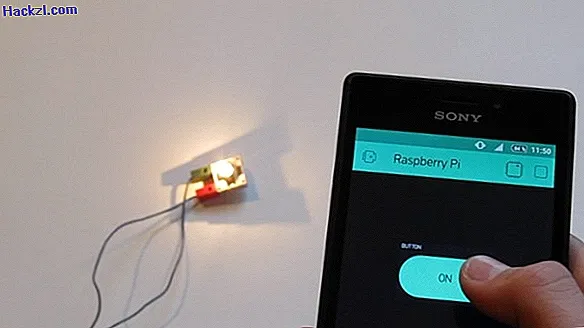
- Dabar galite lengvai įjungti ir išjungti lempą naudodami savo išmanųjį telefoną. Visus žingsnius vėl išsamiai parodome savo nuotraukų galerijoje.

Raspberry Pi: valdykite GPIO kaiščius su Python
Kitas labai praktiškas būdas valdyti GPIO kaiščius yra sukurti Python programą. Jei niekada anksčiau nebendradarbiavote su „Python“, mes rekomenduojame mūsų lengvai suprantamą „Python“ mokymo programą. Tada atlikite šiuos veiksmus:
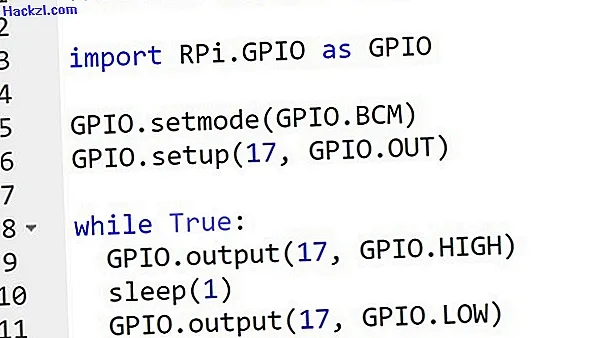
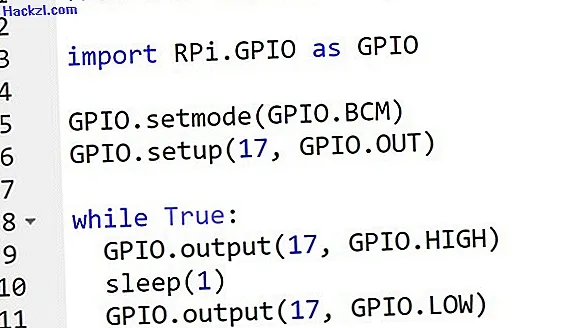
- Pirmiausia importuokite GPIO modulį, skirtą Raspberry Pi, į Python. Norėdami tai padaryti, pridėkite komandą „importuoti RPi.GPIO kaip GPIO“ (be kabučių) pačioje savo kodo pradžioje.
- Tuomet turite nurodyti, ar norite kreiptis į GPIO kaiščius naudodamiesi plokštės numeriu (1–40), ar GPIO numeriu. Jei norite pastarojo, turite įterpti komandą „GPIO.setmode (GPIO.BCM)“.
- Tada apibrėžkite pasirinktą GPIO PIN kodą, naudodami komandą „GPIO.setup (17, GPIO.OUT)“.
- Dabar galite nustatyti GPIO kaištį į „HIGH“, naudodami komandą „GPIO.output (17, GPIO.HIGH)“, kad lemputė įsijungtų, ir komandą „GPIO.output (17, GPIO.LOW)“. Vėl išjunkite lempą.
- Patarimas: sukurti geriausi „Raspberry Pi“ projektai
Kitame praktiniame patarime jums parodysime, kaip jūs taip pat galite skaityti ir rašyti NFC žymas naudodami savo Raspberry Pi. Jei jums taip pat patiko programavimas naudojant Python, nedvejodami atsijunkite mūsų Python programavimo kalbos temos puslapyje. Ten pateiksime vertingų programavimo patarimų, visiškai nemokamų.
Naujausi vaizdo įrašai
1 veiksmas: prijunkite lempą prie savo Raspberry Pi.
Atkreipkite dėmesį į skirtingus „Raspberry Pi“ GPIO ryšius.
2 veiksmas: įdiekite visas reikalingas bibliotekas.
3 veiksmas: atsisiųskite „Blynk“ programą, sukurkite sąskaitą ir pridėkite mygtuką.
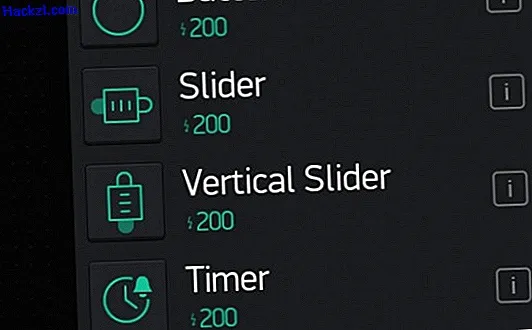
4 žingsnis: Mygtuko nustatymuose pasirinkite GPIO smeigtuką, prie kurio prijungta lempa.
5 veiksmas: paleiskite „Blynk“ klientą savo „Raspberry Pi“ naudodami autentiškumo ženklą, kurį rasite automatiškai sugeneruotame el. Laiške. Nepamirškite iš anksto paspausti programos mygtuką „Pradėti“.

Dabar galite valdyti lempą nuotoliniu būdu išmaniuoju telefonu.
Taip pat galite valdyti GPIO kaiščius naudodami „Python“ programą.
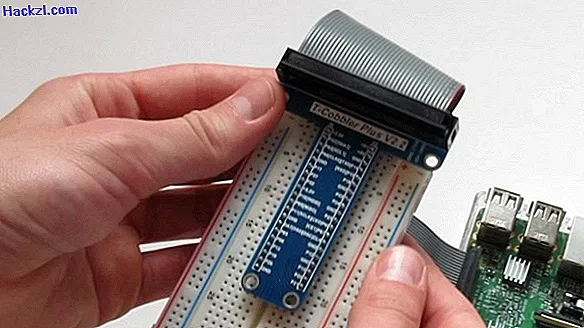
Šis „T-Cobbler“ yra labai praktiškas, su kuriuo „Raspberry Pi“ galite prijungti tiesiai prie duonos lentos.
Šiuo metu „Raspberry Pi 3 Model B“ kainuoja apie 35 eurus.