
Audacity: eksportuoti garso įrašus
Naudodamiesi nemokama garso priemone „Audacity“, galite eksportuoti įrašų dalis. Tai reikalinga, pavyzdžiui, jei suskaitmeninote kasetę ir visos dainos yra viename faile. Šiame praktiniame patarime žingsnis po žingsnio paaiškiname, kaip atskirti „Audacity“ klipus.
Eksportuokite garso įrašus naudodami „Audacity“
Jei norite išsaugoti klipą keliuose failuose, atlikite šiuos veiksmus:
- Atidarykite bet kurį garso failą. Norėdami tai padaryti, tuo pačiu metu paspauskite „Ctrl“ „+“ O “ir pasirinkite failą. WAV, OGG, FLAC ir MP3 palaikomi.
- Norėdami padidinti takelį, paspauskite „Ctrl“ + „1“. Jei norite atitolinti, paspauskite „3“, o ne „1“.
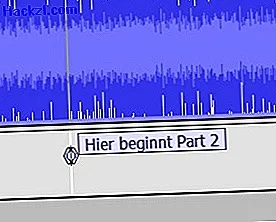
- Paspauskite praleidimo mygtuką. Tai leis jums nusileisti pačioje trasos pradžioje. Dabar jūs sulaužėte etiketę. Norėdami tai padaryti, paspauskite „Ctrl“ + „B“.
- Atkurkite takelį su grojimo mygtuku iki taško, kur norite jį bendrinti. Norėdami sustabdyti vietą, kur norite padalinti takelį, naudokite pauzės mygtuką. Dar kartą paspauskite „Ctrl“ + „B“.
- Jei etiketės yra nustatytos teisingai, abu takelius galite eksportuoti atskirai. Norėdami tai padaryti, spustelėkite "Failas", tada "Eksportuoti kelis failus".
- Dabar galite pasirinkti formatą. Pvz., Pasirinkite MP3, jei norite failą perkelti į MP3 grotuvą. Čia taip pat įvedate tikslinį katalogą.
- Tinkama parinktis „Žymos“ jau nustatyta pagal numatytuosius nustatymus skiltyje „Kurti failus, remiantis“. Nereikia žymėti „Įtraukite garso failus prieš pirmąją žymę“, nes pirmąją etiketę nustatėte tiesiai takelio pradžioje.
- Patvirtinę su „Eksportuoti“, vis tiek galite atskirai redaguoti eksporto takelių metaduomenis.
- Patvirtinkite du kartus spausdami „Gerai“. Tada failas eksportuojamas. Jei pasirinkote failų formatus, tokius kaip MP3, vis tiek gali tekti atsisiųsti ir įdiegti atitinkamą kodeką. Čia galite sužinoti, kaip tai veikia MP3.
Ar žinojai? „Audacity“ galite sukurti savo sparčiuosius klavišus ir dirbti dar greičiau. Kaip tai padaryti, galite sužinoti šiame praktiniame patarime.